Smart Meter Installation: A how-to guide for utilities
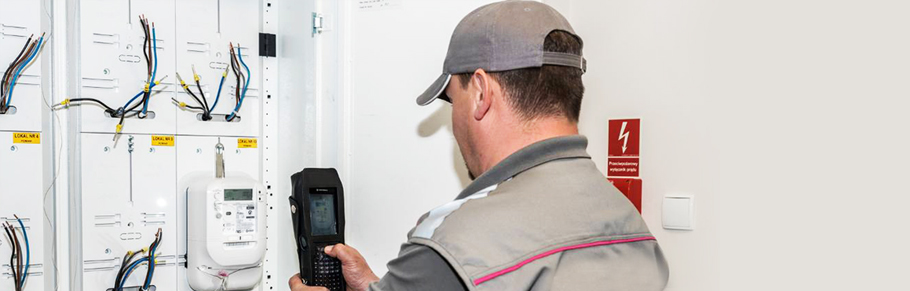
Whether your utility is installing smart meters for the first time for customers or replacing existing communicating meters with NES meters, it is important that you have a clear idea of what to expect on the installation day.
NES meters are designed in a way that makes installing them quite simple, and the process is not much different than installing a non-communicating meter. The intelligent meters and solution specific installation process enable a shorter and less complex meter deployment, which results in fewer mistakes, and provides a disruption-free experience for customers. In this guide, we go through a step by step smart meter installation process for the two cases of Installing a new NES meter or replacing an existing meter.
During both processes, our team undertakes rigorous steps to verify that the meter is functioning properly. At the end of this article, you will find the verification table that we reference along with the installation steps.
Ready to use installation with integrated software & communications
- Automated power line communications (PLC) set-up upon connection
- Automated registration at head-end
- Automated commissioning over the PLC
- Pre-configured for specific tariffs and billing
- Always on security settings and key management applied immediately with power-up.
NES Smart Meter Installation Case 1: Replacing an existing meter

1. Turn off the line power to the existing meter.
Test existing meter terminals to be sure the voltage is off.
If this is not possible, then ensure that safety precautions are taken to prevent electric shock.
2. Remove the terminal cover from the existing meter.
3. Remove the line and load wires from the existing meter terminals. Make sure you label the wires or have a method to identify the line and load wires of phase L1 and neutral for proper installation in the new meter.
4. Remove the old meter.
5. Install the NES meter in the same location as the previous meter, using mounting hardware that is appropriate for the type of surface material.
6. Inspect the line and load wires to make sure they are not damaged or frayed. (Replace if needed.)
7. Connect the line and load wires to the meter terminals, being careful to use the correct phase, neutral, and line/load configuration.
The meter load disconnect contactor On/Off state cannot be visually determined before line power is applied. Only turn on line power to the meter when it is safe to also have power supplied to the load.
8. Turn the supply line power to the meter on.
9. Test each phase line terminal of the meter to make sure power is on to each phase, and that the neutrals are connected to the proper terminals.
10. Turn on the load disconnect contactor by pressing the load disconnect push button. The load disconnect push button can be configured to operate in one of several different modes.
11. Test the load terminals of the meter to make sure power is available to each phase of the load.
12. Check the display for proper operation of the meter. See the “Correct Meter Operation Verification Table” below for more information.
13. Replace the terminal cover. Apply a seal to the sealing screw if necessary or desired. The installation is complete.
NES Smart Meter Installation Case 2: Installing a NES meter in a new location
1. Remove the terminal cover from the meter.
2. Install the meter in an upright position, using mounting hardware that is appropriate for the type of surface material.
3. Connect the line and load wires to the meter terminals, being careful to use the correct phase, neutral, and line/load configuration.
The meter load disconnect contactor On/Off state cannot be visually determined before line power is applied. Only turn on line power to the meter when it is safe to also have power supplied to the load.
4. Turn the supply line power to the meter on.
5. Test each phase line terminal of the meter to make sure power is on to each phase, and that the neutrals are connected to the proper terminals.
6. Turn on the load disconnect contactor by pressing the load disconnect push button. The load disconnect push button can be configured to operate in one of several different modes.
7. Test the load terminals of the meter to make sure power is available to each phase of the load.
8. Check the display for proper operation of the meter. See the “Correct Meter Operation Verification Table” below for more information.
9. Replace the terminal cover. Apply a seal to the sealing screw if necessary or desired. The smart meter installation is complete.
Correct Meter Operation Verification Table
A smart meter installation is not complete without verification using the meter’s multi-function display. After power is applied to the device, every smart meter automatically goes through a verification process to determine if the meter is operating properly. This verification table information can be used to confirm that the meter is operating properly.
Function / Operation
Indicated By
All necessary phases are connected to the meter and providing voltage
The display is active (shows information). The blue LED for the load disconnect contactor acts as configured for the ON state.
Power to load is On
(load disconnect contactor is in the On, or closed, position)
Any one, or all of the following may occur:
 a. If a load is present, one or both of the red LEDs at the right top of the meter front is blinking (rate of blinking depends on power consumption).
b. The “disconnect open” display indicator is Not illuminated, indicating that the disconnect contactor is closed.
c. The blue LED for the load disconnect contactor acts as configured for the ON state.
All necessary phases are connected to the meter and providing voltage
The L1, L2, and/or L3 phase indicators are lit on the display, signifying the phases that have voltage present. If any of these indicators are flashing, then that phase has reverse active energy. If this is unintentional, then it is possible that the current line-in and line-out have been switched accidentally.
Poly phase only: The phases are connected to the meter correctly. The meter does not detect reversed line and load wires or swapped line and neutral.
L1L2L3 indicator is lit on the display (verification only available for 3-phase, 4-wire electrical service)
Poly phase only: The phases are not connected to the meter in the correct order. The meter does not detect every possible incorrect connection order such as L3L1L2, reversed line and load wires, or swapped line and neutral.
L3L2L1 indicator is lit on the display (verification only available for 3-phase, 4-wire electrical service)
The metered building is consuming active energy (forward active)
The “®“ arrow is lit on the display
The metered building is generating active energy (reverse active)
The “¬“ arrow is lit on the display
A self-test failed, a tamper condition has been detected, or an alarm condition has occurred
An error code may lock the display or a caution code may be shown at the end of the scrolling display list, if these codes have been configured to be active.
The terminal cover has been properly installed and the terminal cover tamper switch is closed
The “tamper switch open” display ![]() indicator
is not illuminated, indicating that the cover is installed properly
indicator
is not illuminated, indicating that the cover is installed properly
PLC network communication is occurring
![]() This icon is lit when PLC communication on the network has been detected by the meter. This icon can be used during installation to see if network communication can be ‘heard’ by the meter before the meter is accepted by the system as an active device.
However, you should be aware that a meter installed at the point furthest away from the Control Node may not receive a signal until other meters that can be used as repeaters are installed between it and the Control Node. In this case, the icon would not be activated. As a result, you should consider using this icon for post-installation troubleshooting after all the meters on a system have been installed.
This icon is lit when PLC communication on the network has been detected by the meter. This icon can be used during installation to see if network communication can be ‘heard’ by the meter before the meter is accepted by the system as an active device.
However, you should be aware that a meter installed at the point furthest away from the Control Node may not receive a signal until other meters that can be used as repeaters are installed between it and the Control Node. In this case, the icon would not be activated. As a result, you should consider using this icon for post-installation troubleshooting after all the meters on a system have been installed.
PLC communication has occurred with the meter
![]() This icon indicates that PLC communication occurred with this specific meter within the duration specified by the PLC communication inactive time threshold, which is a configurable value from 1 to 65535 minutes (by default, this set to 1440 minutes, which is equivalent to one day). It also shows the quality of the most recent received PLC message.
This icon indicates that PLC communication occurred with this specific meter within the duration specified by the PLC communication inactive time threshold, which is a configurable value from 1 to 65535 minutes (by default, this set to 1440 minutes, which is equivalent to one day). It also shows the quality of the most recent received PLC message.
After the smart meter’s display has been inspected to confirm there are no errors or alarms, the utility can be confident that the smart meter installation has been successfully completed. Of course, meter installation is just one part of a smart metering system. Besides installing the devices, integrating a Smart Grid analytics software to keep a remote eye on the functionality of the meter helps to ensure a successful project and achieve the expected benefits from the system.